


Online Help
XamIoT offers two connected sensors that work with the same app (SoundSense, on iPhone and Android), the same account and the same customer portal:
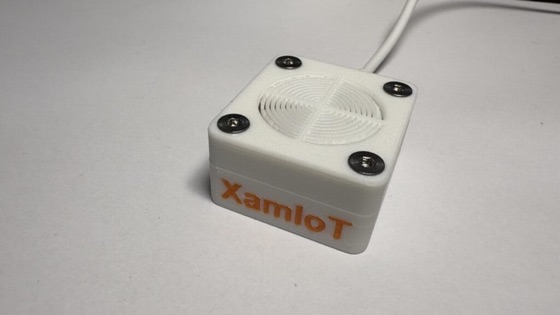 SoundSense — noise level | 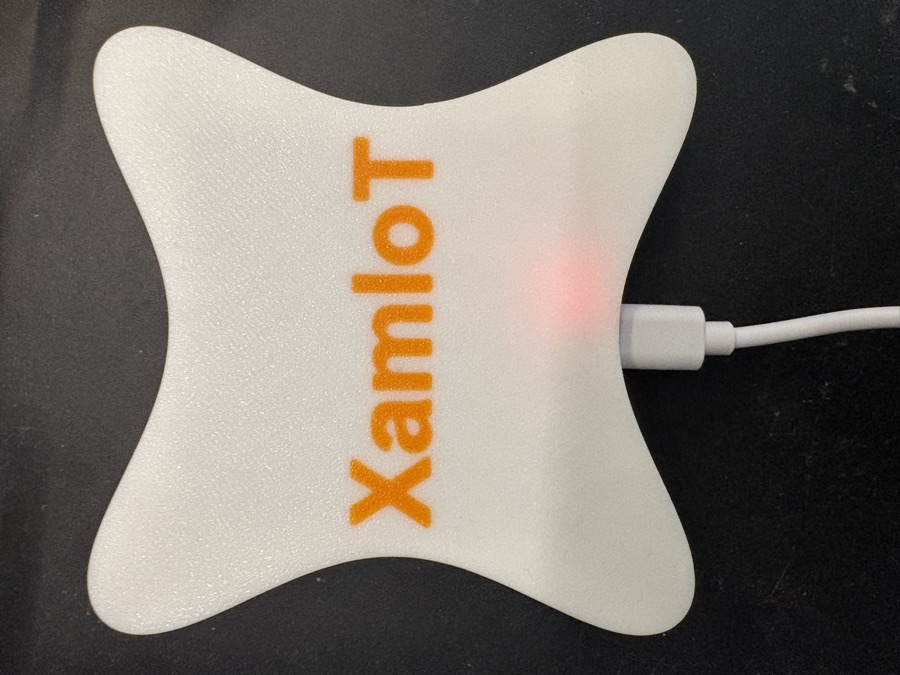 STH — noise, temperature, humidity and pressure |
The first part of this guide is common to both sensors: account, setup, alerts and notifications. The specifics of each sensor are explained afterwards.
Common to both sensors
Per sensor
Also
1) Create an account and sign in
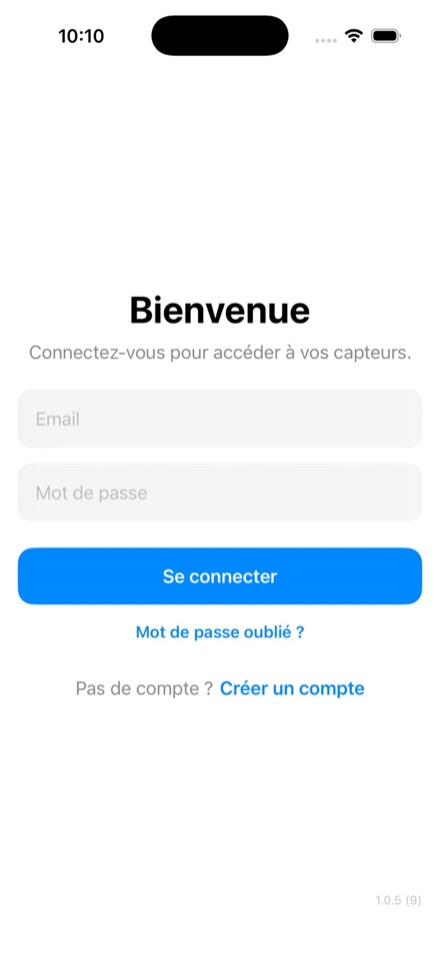 Sign in | 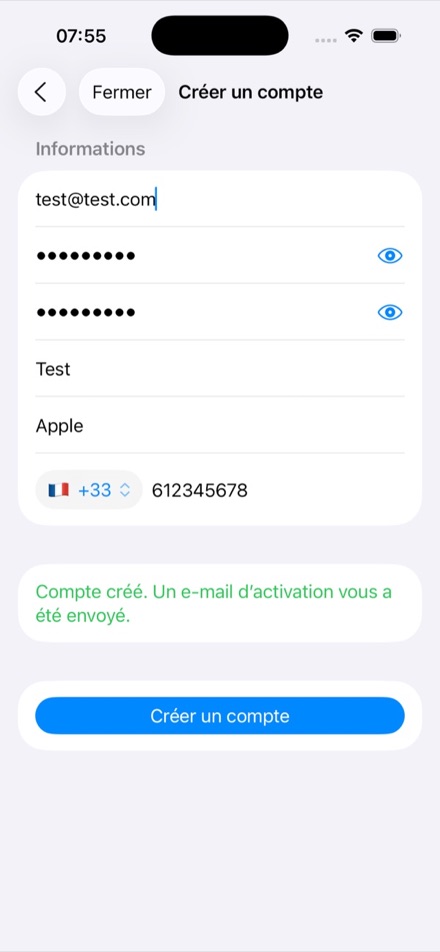 Create an account |
Create an account — on the welcome screen, tap “Create an account” and enter your email, a password, your first and last name and your phone number.
Activate the account — you receive an email: click the activation button in it. You can only sign in after this step.
Sign in — enter your email and password. If you forgot it, tap “Forgotten password ?” to reset it by email.
The same account works in the app and on the customer portal.
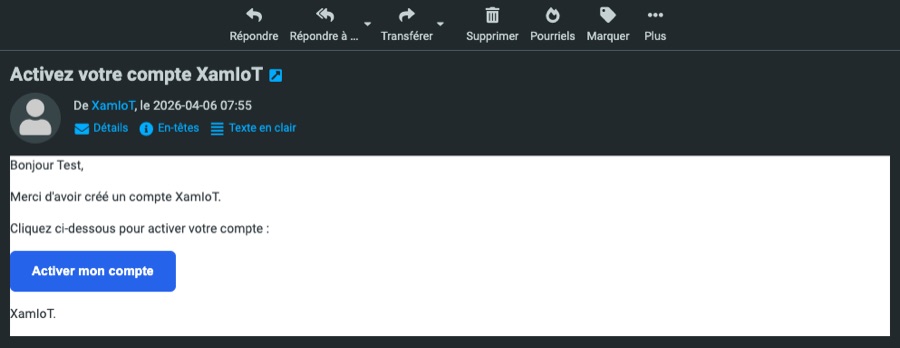
The activation email
Tip: allow notifications when you first open the app. If the activation email does not arrive, check your spam folder.
2) Add a sensor
Setup is the same for SoundSense and STH. It is done from the app, over Bluetooth, in a few minutes.
A 2.4 GHz Wi-Fi network: 5 GHz networks are not supported. Have its name (SSID) and password at hand.
Bluetooth turned on on your phone, and the app allowed to use it.
Stay close to the sensor during the whole setup.
Plug the sensor into a USB power supply and wait a few seconds.
Put it in pairing mode: briefly press (less than 5 seconds) the sensor’s button. The light blinks slowly: the sensor is visible over Bluetooth for 5 minutes.
In the app, on “My devices”, tap + at the top right.
1. Selection of the BLE device — pick your sensor in the list: it is named SOUND-SENSOR-… (SoundSense) or STH-SENSOR-… (STH). Wait until its UID appears.
2. Device Wi-Fi — enter your Wi-Fi name and password, then tap “Set wifi” (iPhone) or “Push Wifi IDs” (Android). Wait for “Connected”.
3. Enroll XamIoT — give the sensor a name (for example “Living room”) and tap “Create device”. It appears in My devices.
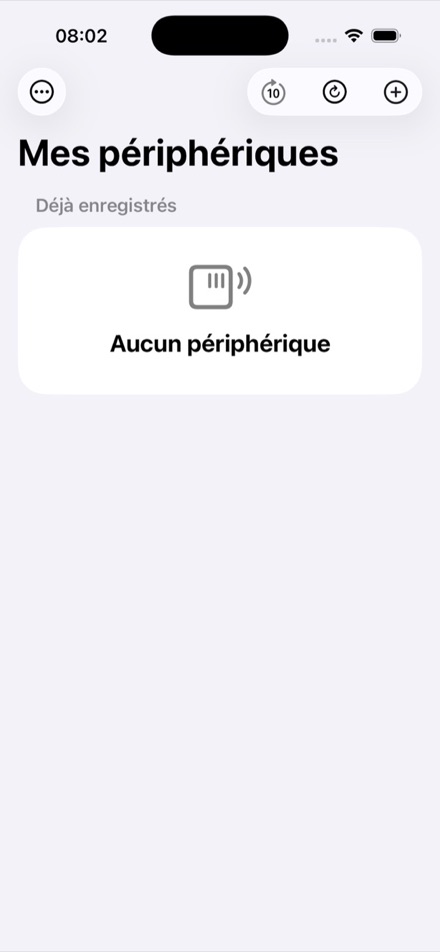 Before the first sensor: tap + | 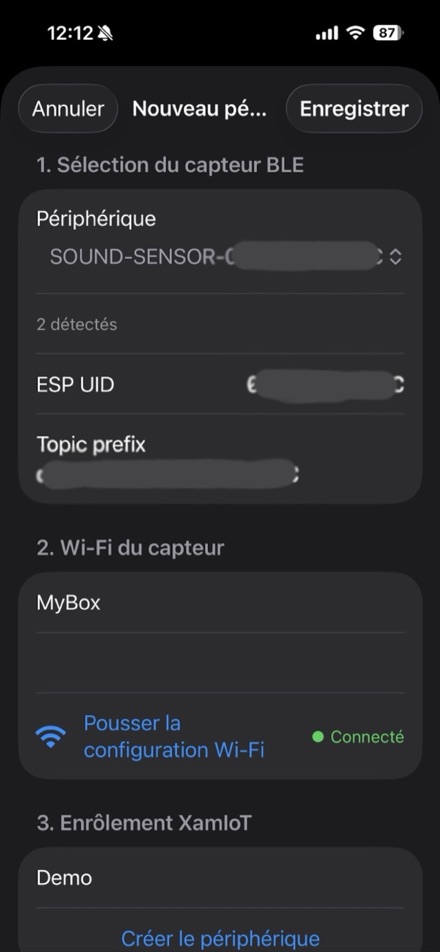 The 3 setup steps |
Tip: if the sensor does not show up in the list, briefly press its button again: pairing mode stops after 5 minutes. See also the FAQ.
3) My devices
The main screen lists all your sensors, SoundSense and STH alike. For each one: its name, its UID, the time since the last reading, a small noise-level chart and the latest alert. Tap a sensor to open its page.
⟳10 — turns automatic refresh every 10 seconds on or off (the button turns green when it is on).
⟳ — refreshes the list once.
+ — adds a sensor (see part 2).
⋯ menu — Signout, Online help, Support (your support requests) and account deletion. On Android, account deletion is under the account icon at the top left.
Edit or delete a sensor — swipe it to the left. “Edit” lets you rename it and set the noise-level calibration. “Delete” removes it from your account; it then goes back to waiting for pairing and can be set up again.
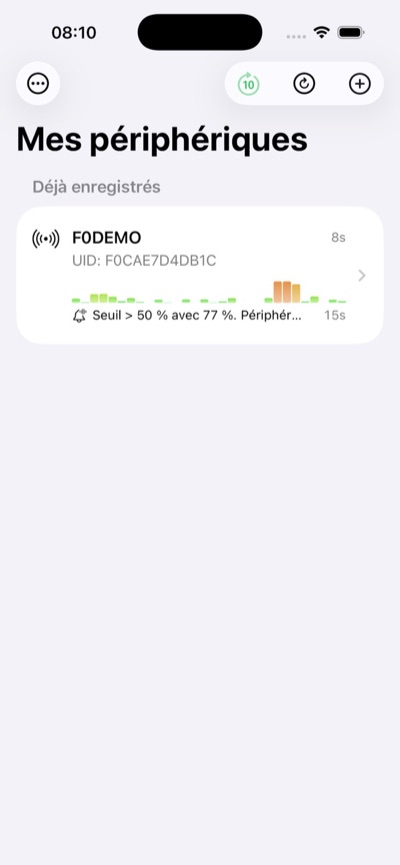 Your sensors | 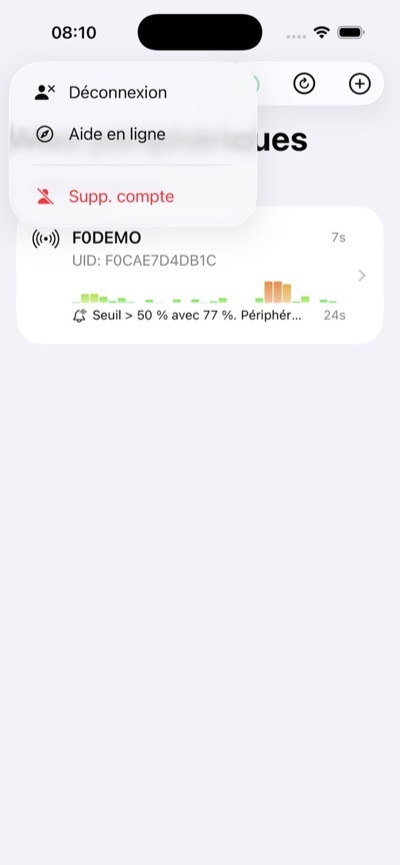 The ⋯ menu | 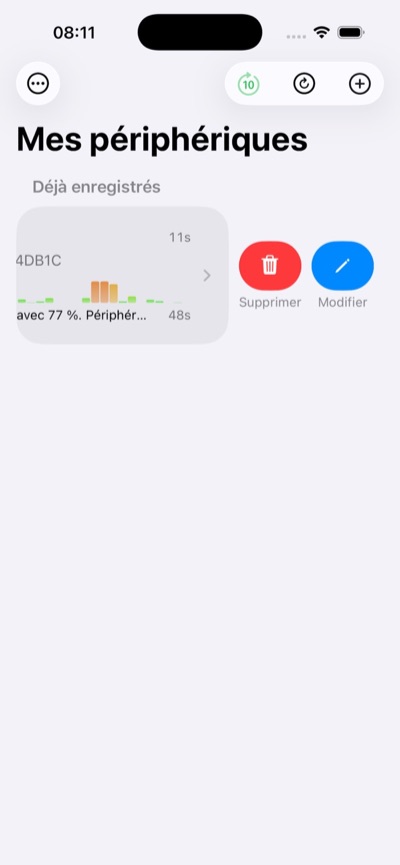 Swipe left to edit or delete |
4) Alert rules and history
A rule watches one of the sensor’s measurements and sends you a notification when its condition is met. You can create as many as you need, for each sensor.
Open the sensor’s page and tap + at the top right.
Choose the alert type: the list depends on the sensor (see parts 7 and 8).
Give it a name, choose the operator (> greater than, < less than…) and the threshold.
Set the cooldown, then tap “Create rule”.
Cooldown — the minimum time between two alerts from the same rule, so you are not notified over and over. Each alert type has a minimum.
Turn a rule on or off with its switch, without deleting it.
Edit or delete a rule by swiping it to the left.
Alarm logs — at the bottom of the sensor page: date, time, measured value and delivery of each alert.
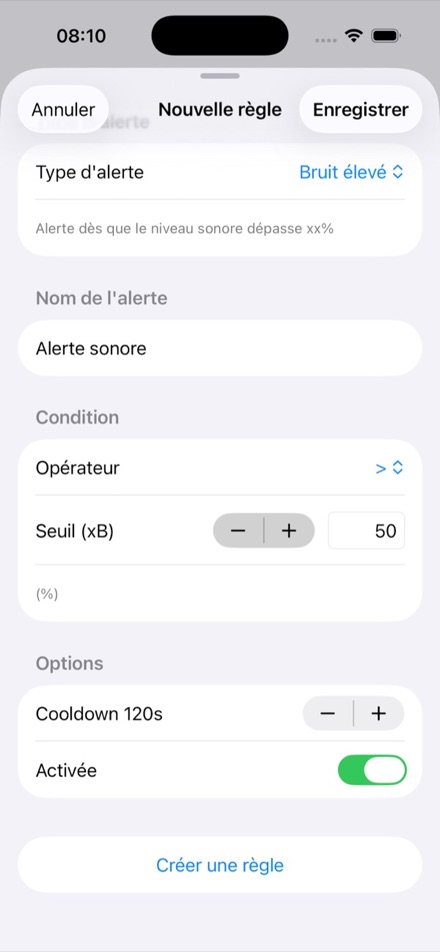 Create a rule | 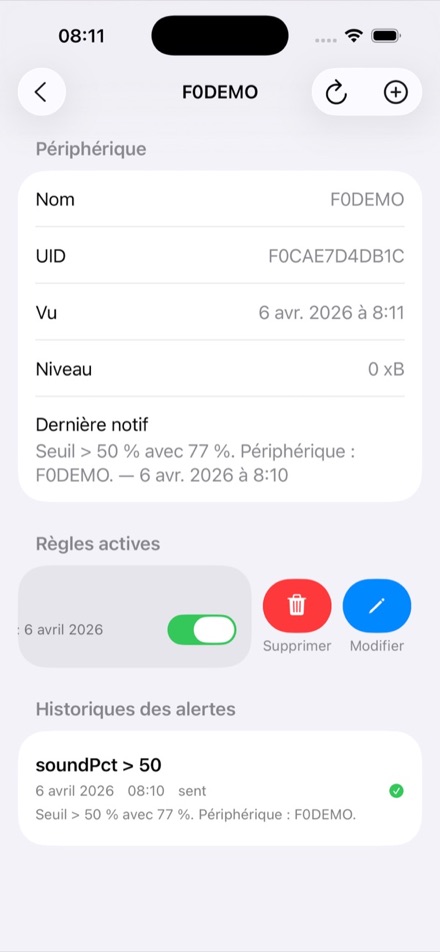 Swipe a rule to edit or delete it |
5) Notifications
Allow notifications — iPhone: Settings > Notifications > SoundSense. Android: Settings > Apps > SoundSense > Notifications.
Each alert shows the rule, the measured value and the sensor, for example “Seuil > 70 xB avec 74 xB. Périphérique : Living room.” (threshold > 70 xB with 74 xB).
All alerts remain available in the history on the sensor page.
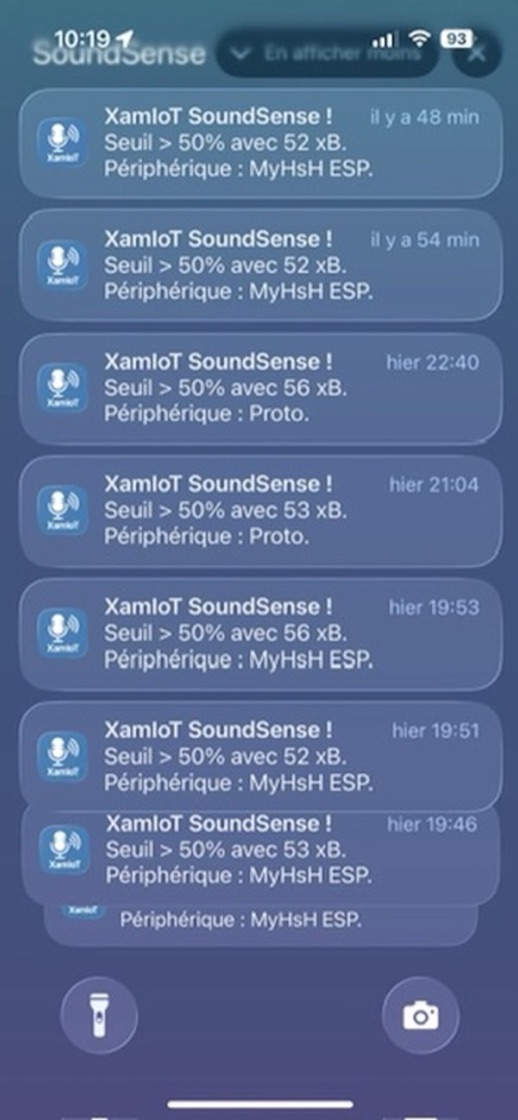
Alerts on the lock screen
6) Customer portal (computer)
The portal portail.xamiot.com gives you access to your sensors from a computer, with the same credentials as the app:
status and latest activity of each sensor, measurements and history (last 50 values);
alert rules: create, edit, turn on or off;
sensor renaming and noise-level calibration;
alert history, order tracking and support requests.
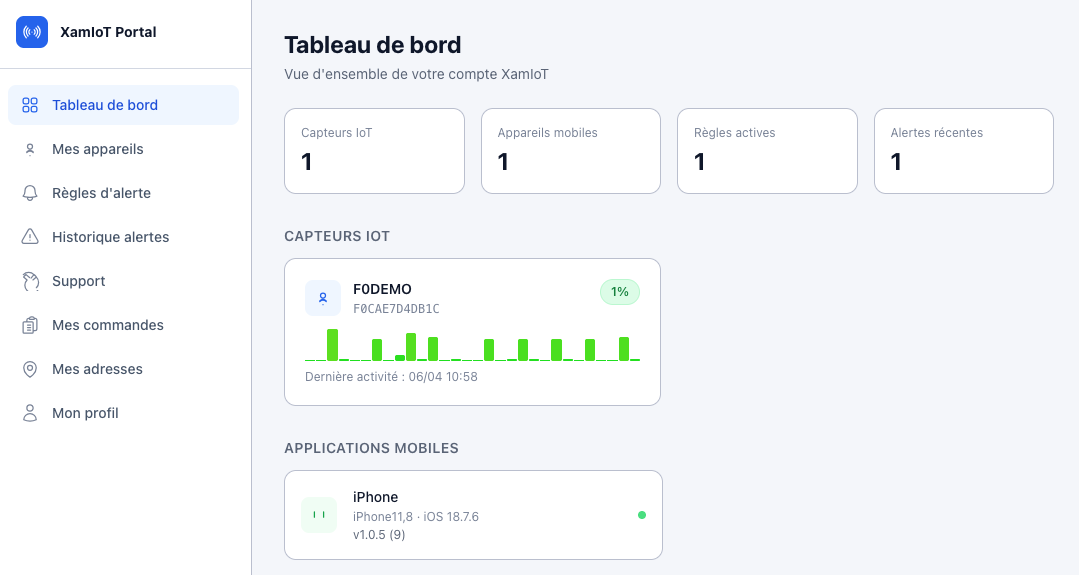
The portal dashboard
New sensors can only be added from the app (Bluetooth is required). More details: portal help.
7) SoundSense: the noise sensor
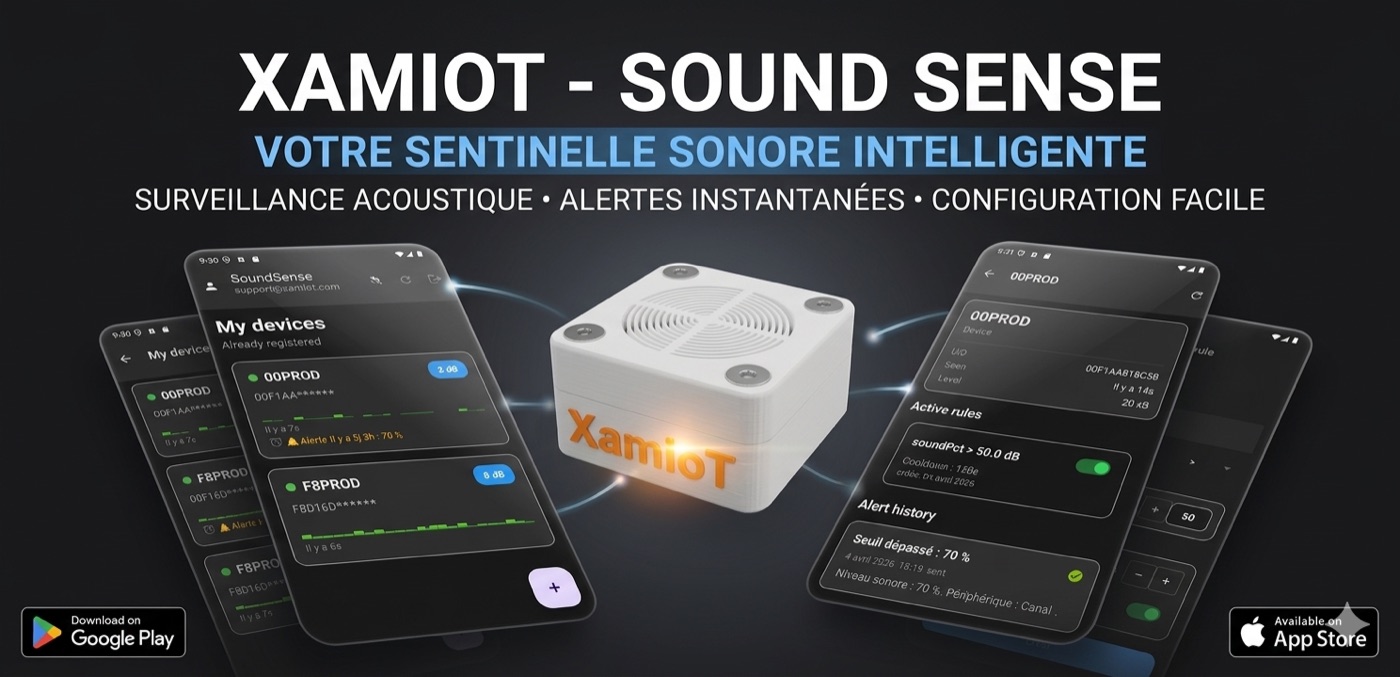
SoundSense measures the noise level in real time and alerts you when a threshold is exceeded. The value is expressed in xB, a XamIoT index from 0 to 100 (not decibels). No conversation is ever recorded.
The sensor page
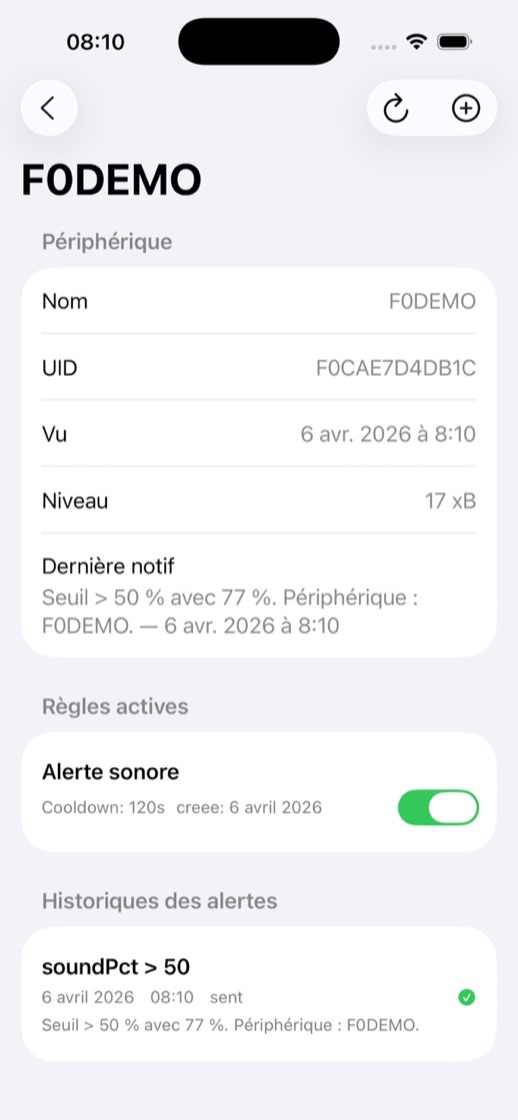
A SoundSense page
Name and UID (the sensor’s unique identifier).
Seen — time of the last reading received.
Level — current noise level, in xB.
Last notif. — summary of the latest alert.
Active rules and Alarm logs (see part 4).
Available alert types
Alert type | What is monitored | Unit | Minimum cooldown |
|---|---|---|---|
Bruit élevé (High noise) | The instant noise level: reacts quickly to a noise peak | xB | 1 min |
Niveau moyen (Average level) | The average noise level: spots noise that lasts (party, music) | xB | 2 min |
As a guide: below 50 xB the room is quiet, from 50 to 75 xB it is lively, above 75 xB it is loud. Start for example with an “Average level > 60 xB” rule and adjust from there.
Noise-level calibration
If the sensor reads slightly too loud or too quiet compared with a reference sound meter, correct it: swipe the sensor to the left in My devices, then “Edit”. The slider goes from −30 to +30 dB: use a negative value if the sensor reads too loud. “Reset to 0” cancels the correction. The sensor applies it the next time it connects.
Where to place it?
Put it in the room to monitor, away from constant noise sources (fridge, ventilation, speaker), and keep it plugged in at all times.
8) STH: noise, temperature, humidity and pressure
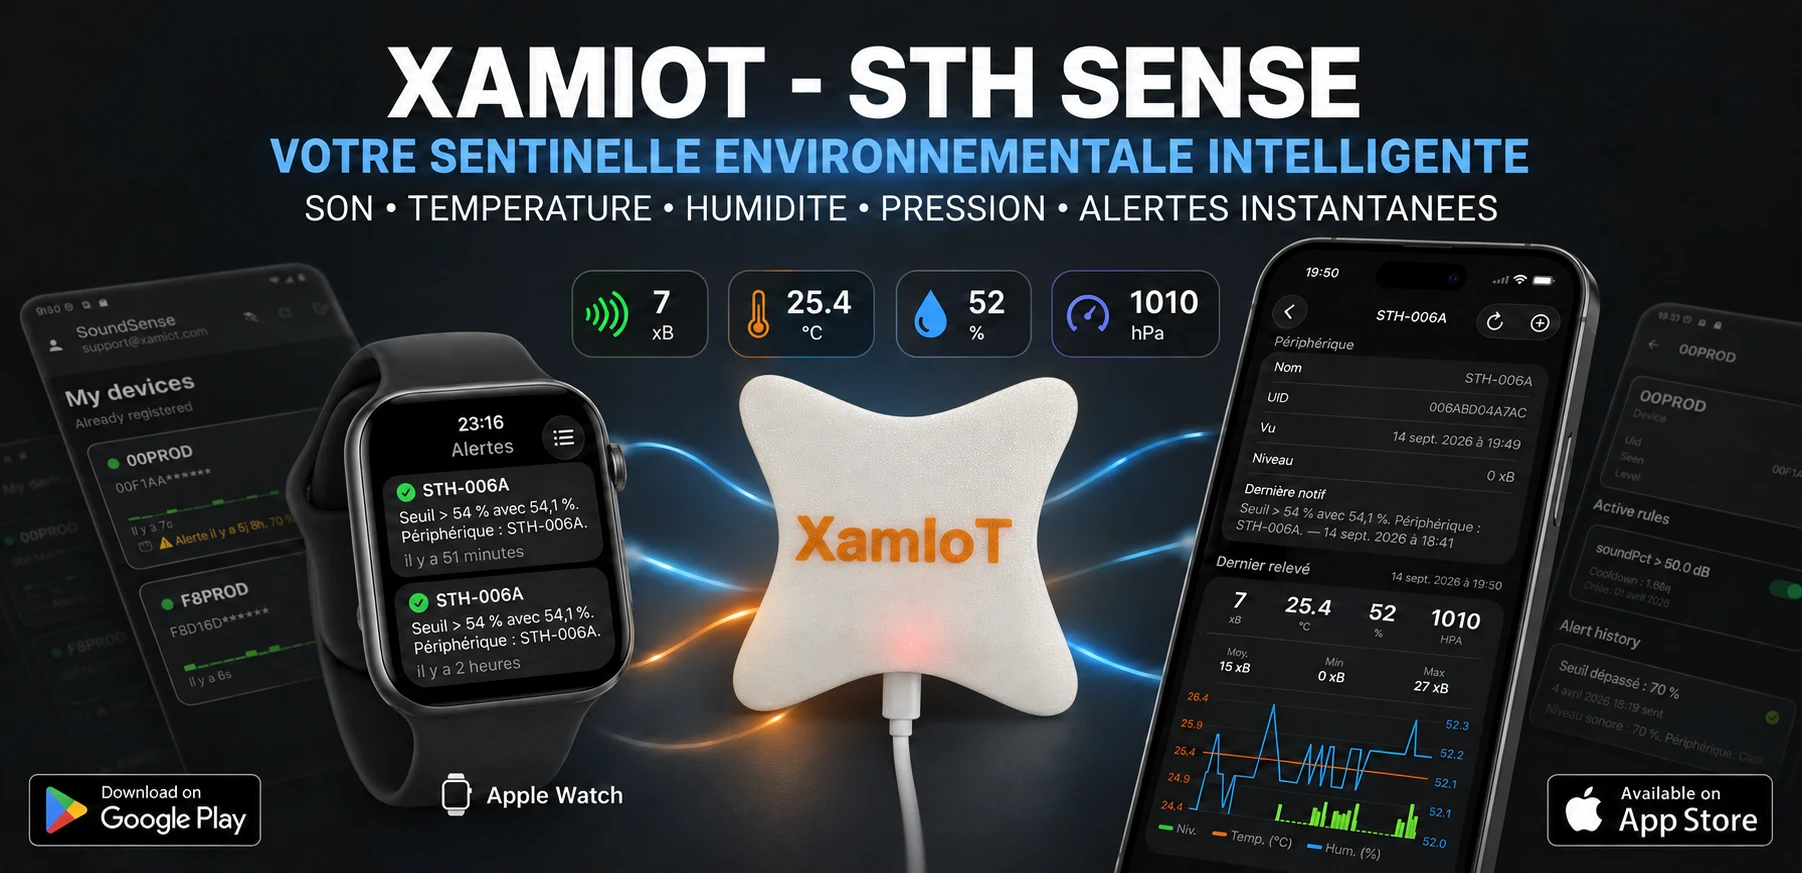
The STH does everything SoundSense does and also monitors temperature (°C), relative humidity (%) and atmospheric pressure (hPa). One device to spot a party, a frost risk, overheating or damp in an empty home.
The sensor page
Latest reading — noise level, temperature, humidity and pressure, with the time of the measurement.
Average, minimum and maximum noise level.
Chart — noise-level bars plus temperature and humidity curves. Tap a legend item to show or hide a curve.
Active rules and alert history, as for every sensor.
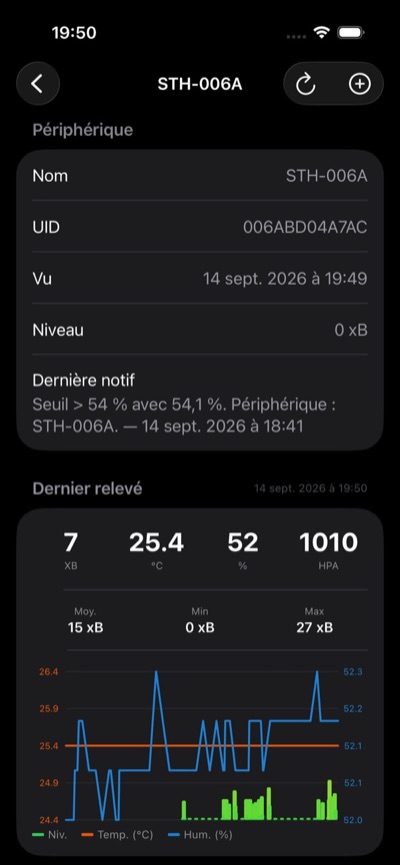 Latest reading and chart | 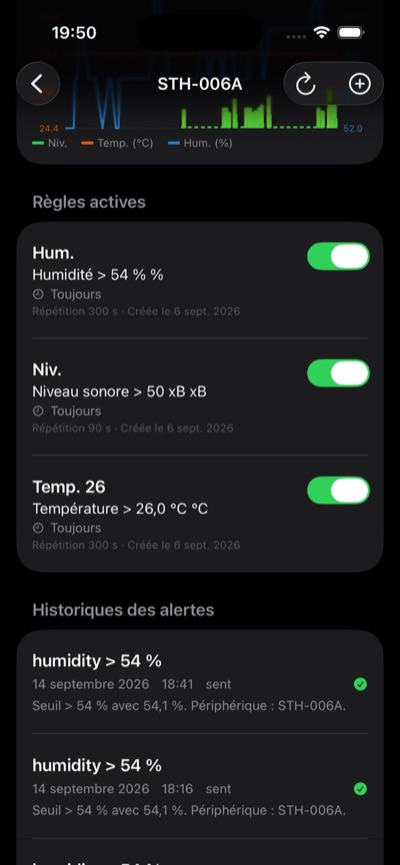 One rule per measurement | 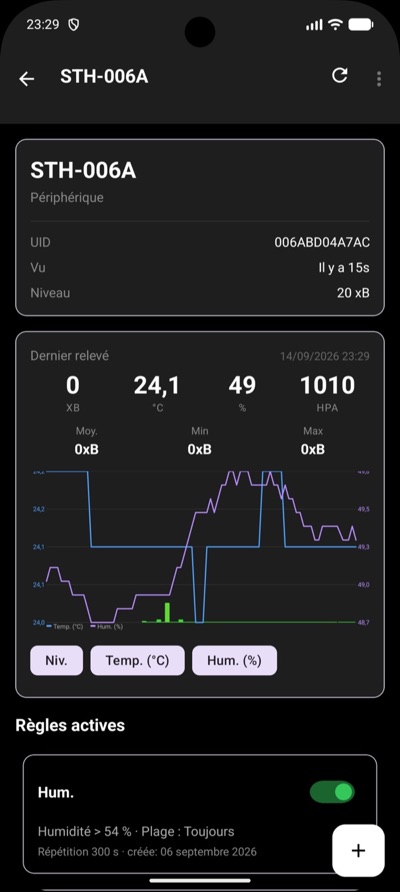 The same page on Android |
Available alert types
Alert type | What is monitored | Unit | Minimum cooldown |
|---|---|---|---|
Niveau en temps réel (Real-time level) | The instant noise level | xB | 1 min 30 |
Niveau moyen (Average level) | The average noise level (lasting noise) | xB | 2 min |
Température (Temperature) | Room temperature (−40 to 85 °C) | °C | 5 min |
Humidité (Humidity) | Relative humidity of the air | % | 5 min |
Pression (Pressure) | Atmospheric pressure | hPa | 10 min |
For temperature, humidity and pressure, you get one alert when the threshold is crossed, then nothing while the value stays on the other side of it. A new alert becomes possible once it is back to normal: you are not notified over and over during a heatwave.
A few useful rules:
Frost risk — Temperature < 5 °C.
Excessive heating or air conditioning — Temperature > 28 °C.
Damp and mould — Humidity > 70 %.
Party or disturbance — Average level > 60 xB.
Noise-level calibration
If the sensor reads slightly too loud or too quiet compared with a reference sound meter, correct it: swipe the sensor to the left in My devices, then “Edit”. The slider goes from −30 to +30 dB: use a negative value if the sensor reads too loud. “Reset to 0” cancels the correction. The sensor applies it the next time it connects.
On the customer portal
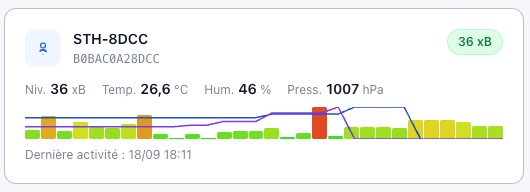
An STH on the portal: noise, temperature, humidity and pressure at a glance
9) FAQ and troubleshooting
What is the xB unit?
A XamIoT index from 0 to 100 that follows the noise level. It resembles decibels but is smoothed: alerts are stable and comparable from one sensor to another, without ever capturing audio.
The light does not blink, or the sensor does not appear in the Bluetooth list
Press the button briefly again: pairing mode lasts 5 minutes.
Check that Bluetooth is on and allowed for the SoundSense app.
Move closer to the sensor.
“WiFi connection failed”
The Wi-Fi must be 2.4 GHz. If your router broadcasts 2.4 and 5 GHz under the same name and the connection fails, try enabling a separate 2.4 GHz network.
Check the name and password (including capital letters). The password must be at least 8 characters long.
I changed my router or Wi-Fi password
Delete the sensor in the app (swipe left, then “Delete”): it goes back to waiting for pairing. Then add it again (part 2). As a last resort, hold the sensor’s button for 5 seconds or more and release it: it erases its Wi-Fi settings and restarts.
I do not receive alerts
Notifications must be allowed for SoundSense (part 5).
The rule must be turned on, and its cooldown must not be running.
The sensor must be sending data: the “Seen” field on its page must be recent.
Temperature, humidity and pressure: one alert per threshold crossing (part 8).
The level stays at 0 or the data no longer updates
Check that the sensor is powered and that the Wi-Fi works, then tap ⟳ to refresh.
10) Privacy
No audio recording: the sensors never capture or store conversations.
Only measured values (noise level in xB and, for the STH, temperature, humidity and pressure) and alert events are sent.
You control your rules, thresholds and notifications at any time.
Need help? In the app, open the ⋯ menu then “Support”, or write to us from the Contact page.